This document explains MindBoard 2 Version 0.7.5.
MindBoard 2 User Guide
1. Introduction
1.1. Overview
MindBoard 2 is a simple mind mapping application with handwriting for Android tablets.
It supports Finger or Stylus input.
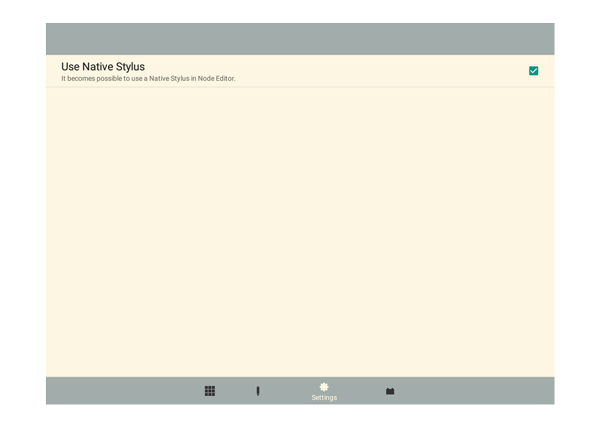
You can choose which mode to use by using the Use Native Stylus option in Settings.
1.2. Concept
Simple and Standard
This app aims to be the best and standard mind mapping with handwriting application for Android tablets.
1.3. Key Features
-
Directly channel your thoughts using Finger or Stylus
-
Multiple mindmaps ( central nodes ) in one document
-
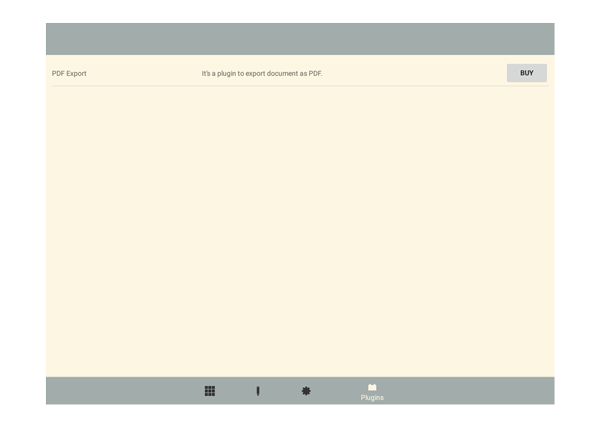
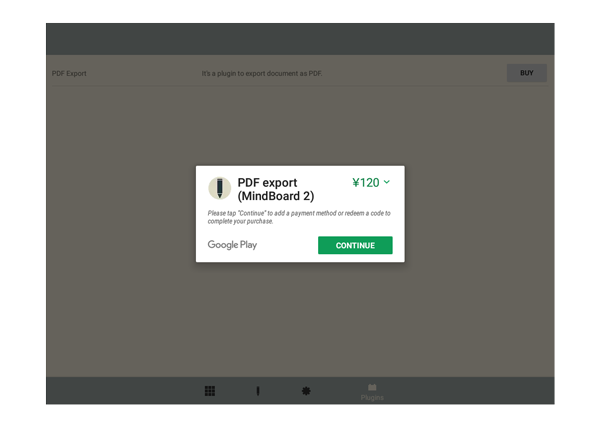
PDF Export (Plugin)
-
Input: Stylus, Image and Text
-
Open, Save and Sync documents with Google Drive
1.4. Requirement
-
Android 4.4 Kitkat or newer.
This app is designed for Android tablets.
| For the best mindmapping experience, it’s recommended to use Native Stylus ( S-Pen or Z-Stylus ) Android tablets. |
1.5. Installation
Get the MindBoard 2 app on Google Play.
1.6. Getting help
If you have any questions, please make contact. And also your feedback will be much appreciated.
2. Using MindBoard 2
2.1. Overview
There are four screens.
-
(1) File Manager
-
(2) Editor
-
(3) Settings
-
(4) Plugins
Use the bottom navigation to switch between screens.
2.2. (1) File Manager
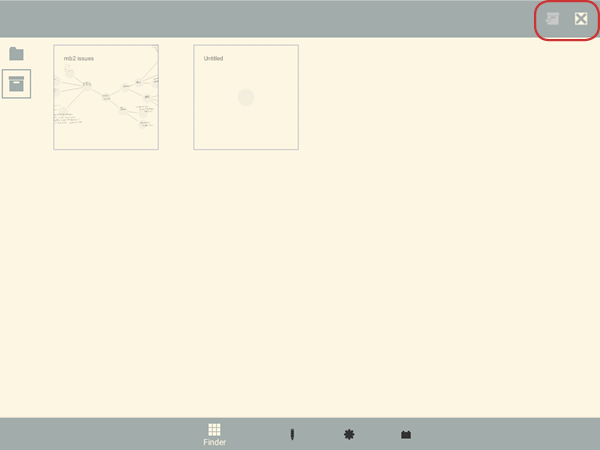
This is for document management. There are Primary and Archive Folders.
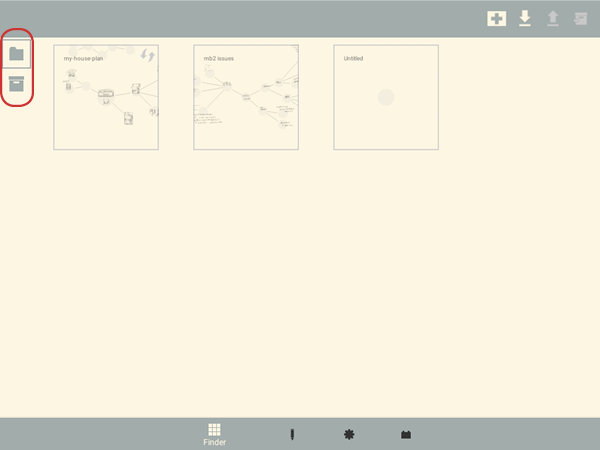
-
Tap the icon to switch between
 Primary and
  Archive
2.2.1. Primary Folder
This folder manages primary documents.
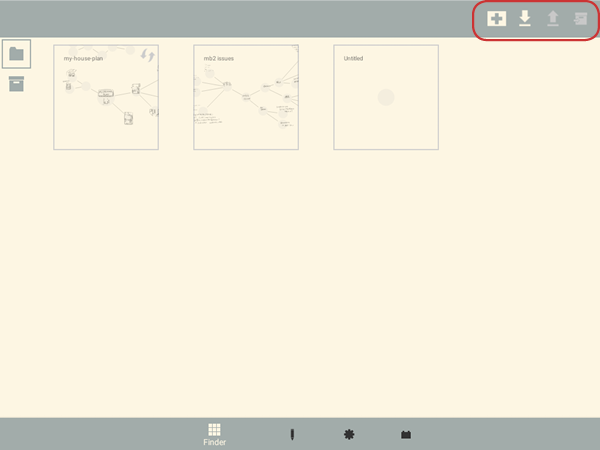
-
 Add new document
 -
 Open document from Google Drive
 -
 Save As selected document into Google Drive
 -
 Move selected document into Archive Folder
|
The sync mark |
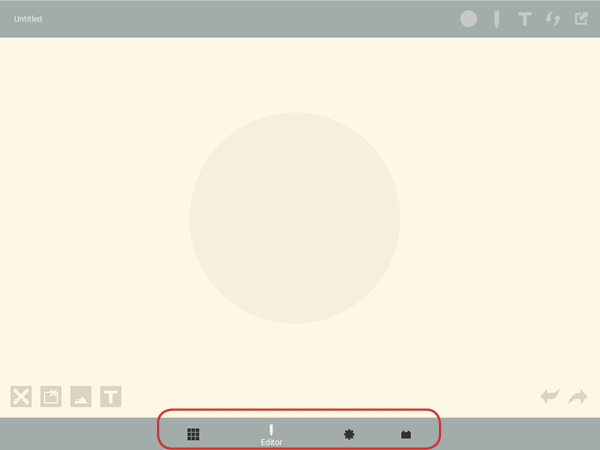
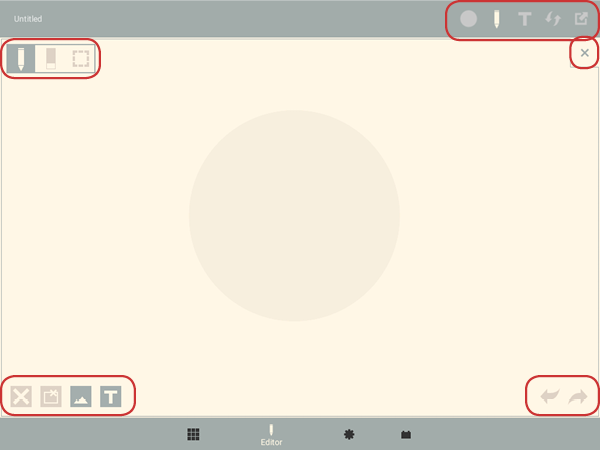
2.3. (2) Editor
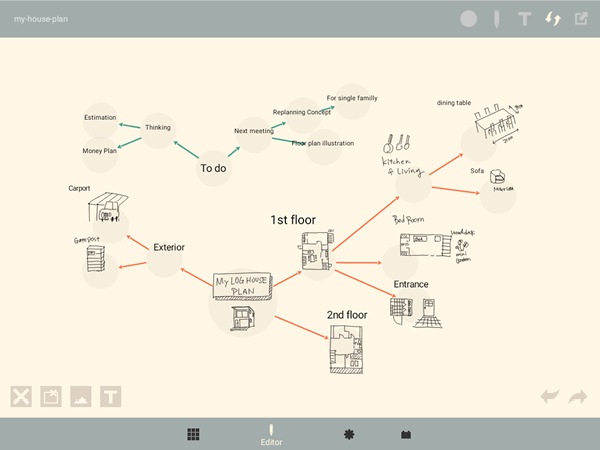
This is for mind mapping.
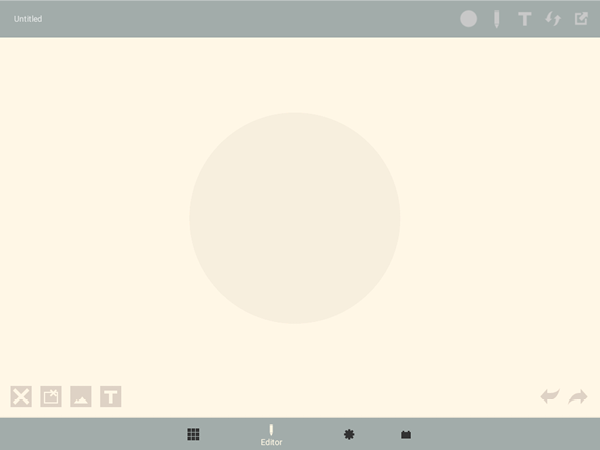
There are two modes, Map Edit Mode and Node Edit Mode.
2.3.1. Map Edit Mode
This mode is for freely creating and organizing nodes in order to do mind mapping.
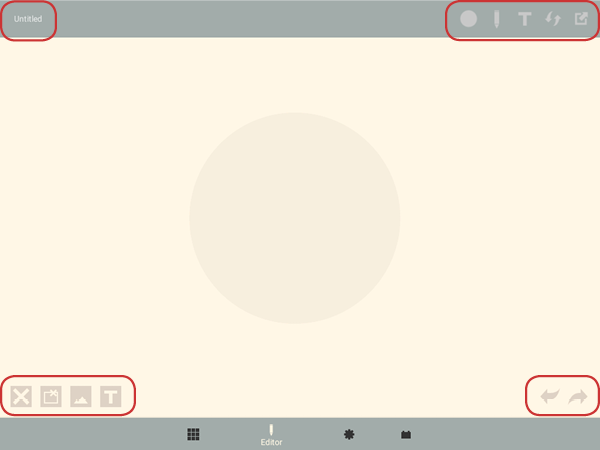
Map Title (Left-Top)
-
Tap a title text and you can change it.
Toolbar (Right-Top)
-
 Change selected node branch color
 -
 Sync this document with Google Drive File ( if it’s linked )
 -
 Export current document as PDF into Google Drive ( PDF Export Plugin is needed. )
Toolbar (Left-Bottom)
-
 Delete selected node
Toolbar (Right-Bottom)
-
 Undo
Undo -
 Redo
Redo
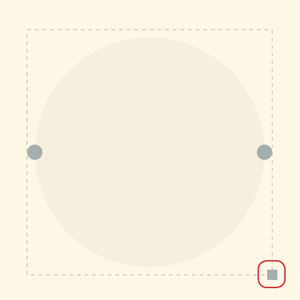
Creating Child Node
Use the child node create handle on the node.
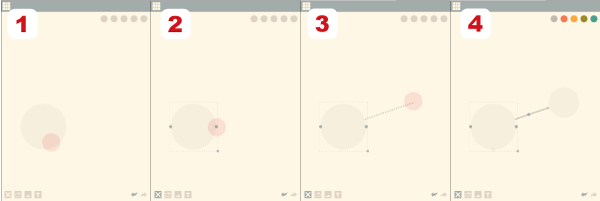
-
Tap the node to change the node status to selected → The child node create handle appears on the left or right side of the node.
-
Drag the child node create handle.
-
Stop dragging in the desired location for the new node.
-
The new child node is created.
Cutting the branch between Parent and Child Node
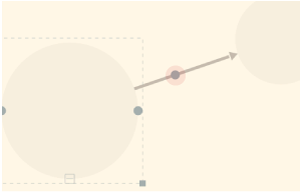
-
Select the parent node → the cut branch handle appears in the middle of the branch.
-
Drag the cut branch handle to cut the branch → the orphaned child-type node changes into a central-type node.
| It’s possible to re-parent the orphaned node to make it a child-type node again. To do this, drag a child node create handle from the desired parent onto the node. |
2.3.2. Node Edit Mode
This mode is for drawing your thoughts on a node.
Tool Switcher ( Left-Top )
-
There are some tool icons here. In details, See the next Tool Switcher section.
Toolbar ( Right-Top )
-
 Set stroke color / Changes the stroke color of the selected group.
 -
 Change the selected text color.
Toolbar ( Left-Bottom )
-
 Ungroup the selected group.
 -
 Insert an image from Google Drive.
 -
 Input a text.
Toolbar ( Right-Bottom )
-
Undo
-
Redo
CloseButton ( Right-Top )
-
 Back to the Map Edit Mode
| If you have checked Use Native Style in the Settings, it’s also possible to return to the Map Edit Mode by double-tapping with a finger. |
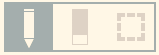
Tool Switcher

There are four tools, Pen / Eraser / Selection / Zoom.
In order to switch to a tool, tap it.
| Changing Pen Thickness is not currently supported. A Multiple Pen Thickness feature is planned as plugin. |
Tool Switcher ( if you have checked the Use Native Stylus option )
There are three tools, Pen / Eraser / Selection.
In order to switch to a tool, tap it.
| Changing Pen Thickness is not currently supported. A Multiple Pen Thickness feature is planned as plugin. |
Making Strokes Group
It’s possible to group multiple strokes.
-
Pick the
 the Selection Tool on the Tool-Switcher.
 -
Lasso the desired set of strokes by circling them using finger or stylus.
Now it’s possible to manipulate the group as follows:
-
Change the color of strokes
-
Resize the group
-
Ungroup
-
Delete the group